Dolby Atmos – Studio-Setup & Music Production

Lesezeit 8 min

DOLBY ATMOS – STUDIO-SETUP & MUSIC PRODUCTION

In the first two parts of this blog, we explored how consumers can enjoy Dolby Atmos and how to listen to Dolby Atmos material via headphones – keyword: binauralisation.

What is Dolby Atmos?

Dolby Atmos – in the studio, at home & on the go

In this part, things get serious as we delve into studio setup and music production in Dolby Atmos, with tips and tricks to ease your entry into the world of immersive audio experiences.

TABLE OF CONTENTS

Do I need a dedicated Dolby Atmos studio? 

The answer is yes and no. That may not sound very helpful at first, but it’s a fact: if you want to work with a Dolby Atmos-compatible speaker setup, you’ll need at least eight (5.1.2 setup) or preferably ten (7.1.4 setup) speakers, and an interface with the corresponding number of outputs. Ideally, the speakers should all be from the same manufacturer and product series. This level of investment is not insignificant. The three front speakers – left, right, centre – should be powerful, while the side, rear and ceiling speakers can be slightly less powerful.

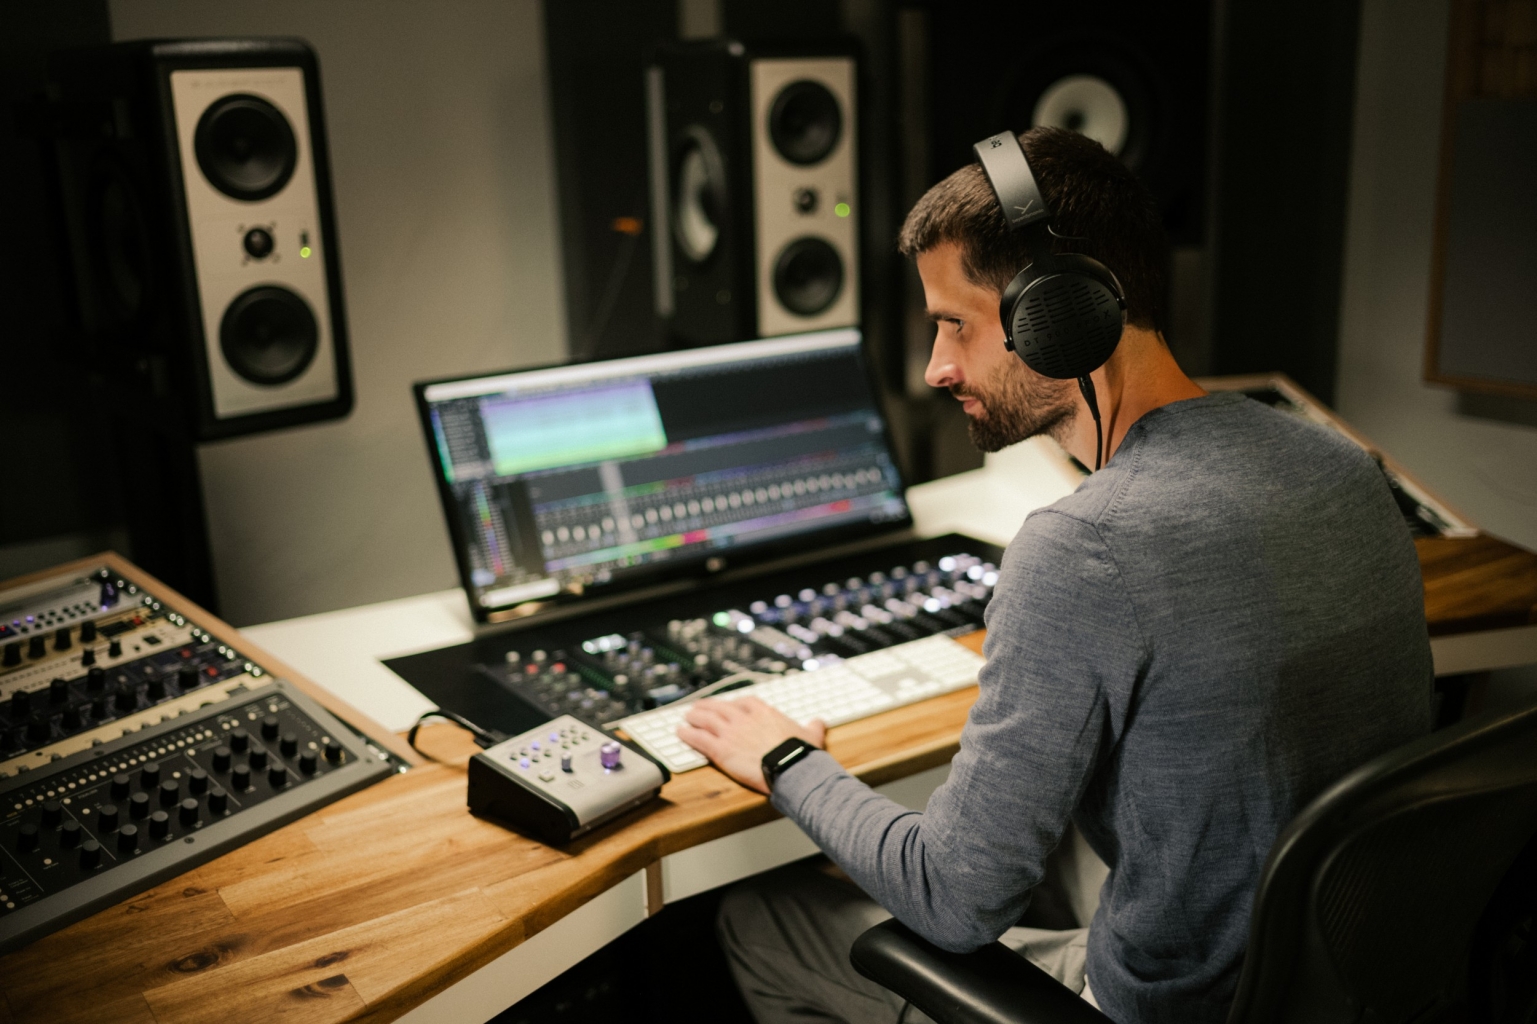
If you want to keep things simpler at the beginning, playback via headphones works wonderfully too, as explained in the second part of the blog.

Our tip:

Some headphone models are significantly better suited for monitoring binaural audio signals than others. We generally recommend acoustically open-back headphones, where the transducers or membranes are not too close to the ear.

The key component is the studio computer running the DAW software. Naturally, it should be as powerful as possible. With Dolby Atmos, a channel strip may require not just two channels like in stereo, but ten or more individual channels. The increased number of channels and the resources needed for plug-ins raise the performance requirements by about five times compared to stereo production. This can easily push a studio computer to its limits.

To ensure long-term usability, investing in a powerful model is worthwhile. The number of CPU cores is crucial. To ensure the computer meets the performance level required for DAW software, seek thorough advice before purchasing. Office applications have very different requirements, and even a gaming PC isn’t suitable, as graphics and video editing demand a completely different performance profile than 3D audio. The graphics card is secondary here, but the number of cores and CPU clock speed should be as high as possible. A studio computer with fewer than eight cores won’t suffice; 16 is better, and an Intel i5 or i7 processor is inadequate – the minimum requirement is an i9 or, better yet, a workstation variant. A powerful MacBook with the latest generation Apple Silicon CPU is also suitable. But again, good advice from a specialist company is invaluable.

Which DAW Software is suitable?

Some DAW software is more suitable for music production with Dolby Atmos than others. However, it’s also possible to upgrade your preferred DAW software – we’ll cover that later. Particularly well-suited for Dolby Atmos music production are Cubase and Nuendo by Steinberg, Logic Pro by Apple, and Pro Tools by Avid. Other variants may also work, albeit with some limitations in convenience.Dolby Atmos hat eine vorgegebene Reihenfolge der Kanäle. Hier einmal die Liste eines 7.1.2 Dolby Atmos Bed mit den üblichen Abkürzungen für die Kanäle und deren Beschreibung.

01: L (left)
02: R (right)
03: C (center)
04: Lfe (bass channel)
05: Ls (left side/surround)
06: Rs (right side/surround)
07: Lrs (left rear surround)
08: Rrs (right rear surround)
09: Ltm (left top/ceiling centre)
10: Rtm (right Ttp/ceiling centre)

Of course, it would be too easy if all DAW software manufacturers followed this order. Some programs, like Cubase and Nuendo, use a different internal order. Plug-ins usually compensate for this by adjusting the mapping when they detect the DAW software. Manual adjustment is rarely necessary.

What Requirements does Dolby Atmos place on DAW Software?

In the first part of the Dolby Atmos series, we discussed the Dolby Atmos Renderer. It’s essential for monitoring and creating the necessary files for production. There are two basic operating modes.

The first method is mainly used in larger studios. The Dolby Atmos Renderer runs on a second, external computer, such as an Apple Mac mini, and the software must be purchased separately from Dolby. The connection between computers is via an audio interface (usually MADI) or an audio network. The advantage of external operation is reduced load on the DAW computer, freeing up capacity for other tasks.

DAW software packages now also offer an internal Dolby Atmos Renderer. This puts more demand on the studio computer but eliminates the need for external connections, additional audio interfaces or networks, and the Dolby Atmos software doesn’t need to be purchased. Smaller studios tend to use the internal Dolby Atmos Renderer. We’ll focus exclusively on this method.

The Renderer primarily handles monitoring. Through authoring in the DAW software, beds – 3D audio submixes – and 3D audio objects are created and assigned to tracks. These virtual connections override those of the internal DAW mixer.

It’s also important to set a sampling rate of 48 kHz and a driver buffer size of 512 samples for Dolby Atmos. There are prospects for 96 kHz Dolby Atmos productions, but these are rare and further increase the demands on the studio computer.

After completing the Dolby Atmos production, a file containing all necessary data for further use is generated – audio content and metadata. This is the Dolby Atmos Master ADM file (ADM: Audio Definition Model).

In the DAW software, a multipanner in a channel strip sets the virtual direction of the sound source. Display and handling vary by DAW software. Usually, different views are available, such as a 3D room view, top view or side view. These are especially helpful for setting height channels.

Are there simpler or alternative Solutions?

What if your preferred DAW software doesn’t support the Dolby Atmos Renderer? There’s a solution: the “Dolby Atmos Composer” by Fiedler Audio. This software brings Dolby Atmos functionality to your chosen workstation, offers a simplified workflow, and resolves some limitations of the Dolby Atmos Renderer.

The software consists of the Dolby Atmos Composer, which acts as a Renderer replacement in the master channel as a plug-in, and the “Dolby Atmos Beam” plug-in on other channels. The Beam plug-in connects to the Composer and defines whether a channel is treated as a bed or object. It also includes the multipanner.

The Dolby Atmos Composer also enables direct binaural monitoring via headphones without additional plug-ins. This software solution allows Dolby Atmos production even on stereo-only DAWs.

Which Plug-ins do I need?

There are now suitable plug-ins for almost all multichannel production needs. And because there are still unmet needs, functionality continues to evolve and will eventually meet all requirements.

Essential tools for multichannel production include those that allow adjustment of individual channel levels or channel mapping within a channel strip. With auralControl by PSP, you can adjust channel levels, mute individual channels or solo them. With Matrix by Sound Particles, users can quickly change channel routing within a strip. These are tasks that DAW onboard tools often struggle with – even though they’re fundamental functions.

For EQ, filter and dynamics processing, most multichannel-capable DAW software packages offer built-in plug-ins, and the range of multichannel plug-ins is growing. However, not all plug-ins support every channel configuration. Many multichannel plug-ins still only support Dolby Atmos beds up to 7.1.2 format, with 7.1.4 and higher often unsupported. But this barrier is slowly falling as manufacturers recognise the need.

There’s a vast selection of reverb plug-ins. Many DAW internal plug-ins lack proper multichannel support. Here are a few examples: “Roomenizer” by Masterpinguin is excellent for real-acoustic material.

Other examples include “Paragon” by Nugen, which works well in music production, and “Cinematic Rooms” by Liquid Sonics, ideal for film music and post-production. “Lustrous Plates” by Liquid Sonics offers a multichannel plate reverb simulation.

Unfortunately, there’s little available in multichannel sound generation. The synthesiser SkyDust 3D by Sound Particles is one of the few virtual instruments capable of 3D audio.

Stereo first and then Dolby Atmos, or the other way around?

Let’s now address the workflow in combined stereo and Dolby Atmos multichannel production. Typically, stereo production is created first. From this, individual stems – submixes – are exported in stereo, often with and without effects. These stems are then imported into a Dolby Atmos production environment and processed further to create the Dolby Atmos version based on the stereo material. This is a viable and simple approach, but it misses many opportunities of immersive audio production. Ideally, electronic music should be composed immersively or in 3D audio from the start.

Conversely, it’s not easy to generate a stereo version from a 3D audio production. Tools like downmix plug-ins exist to convert 3D audio to stereo, but results are often unconvincing, as stereo mixes use different approaches than multichannel production.

Which path to take depends heavily on the source material and music genre. In highly electronic music, conversion to stereo from 3D audio/Dolby Atmos is often preferred, while in acoustic music, a stereo production is more commonly created first, followed by the Dolby Atmos mix.

But with Dolby Atmos and 3D audio, the rule is: rules are made to be broken.

How is immersive material used in the mix?

How do I handle material within a 3D audio or Dolby Atmos production? As mentioned, approaches vary widely. EQ and filter usage is similar, but dynamics and compressor use differ. The spatial distribution of sound sources allows instruments to be distinguished more clearly by ear. Compression on the master and summing channels is used more sparingly, especially in electronic music where instruments are spread across the entire space.

Reverb usage depends on the workflow. If working with stereo stems – stereo sums of instruments or small groups placed as stereo objects – stereo reverb is often used in the channel strip to imprint a space. If working with individual sources placed as objects, 3D audio reverbs are used in the summing and possibly master channel, especially with acoustic material. Note that 3D audio reverb plug-ins can consume significant CPU resources.

Placement of individual sources or instruments in space is crucial. Approaches vary by music and recording type. In purely electronic music, extreme panning is acceptable. A synth pad can come from the ceiling, and drums can be distributed across all speakers or directions. Creativity is welcome, but it’s best to plan immersive panning during composition.

In productions with acoustic instruments or orchestras, more restraint is needed in placement. Listener expectations must be met, focusing on a concert experience. Careful use of 3D audio reverbs and room mic channels is key, with attention to audience noise placement. The listener should feel acoustically like a concert attendee.

Conclusion

Dolby Atmos productions are significantly more complex than stereo productions, and studio requirements – especially for computer performance – are higher. But as the saying goes: Dolby Atmos is the new stereo. We’re still on the journey, but it’s clear: anyone aiming for a long-term career in the music industry – as a composer, musician, producer or sound engineer – must engage deeply with immersive sound and Dolby Atmos. Suitable tools are available to get started on a laptop with headphone monitoring. So – let’s do it.

Wie bewertest du diesen Artikel?

Rating: 0 / 5. Anzahl Bewertungen: 0

Did you find this article helpful?